The Attribute Editor contains the ability to edit the attributes, or metadata, associated with any object. To open the Attribute Editor click on an object. In the Property Manager, click on the Info tab. In the Options section, click the Edit button next to Edit attributes. Attributes can be added, deleted, edited, and reordered in the Attribute Editor dialog.
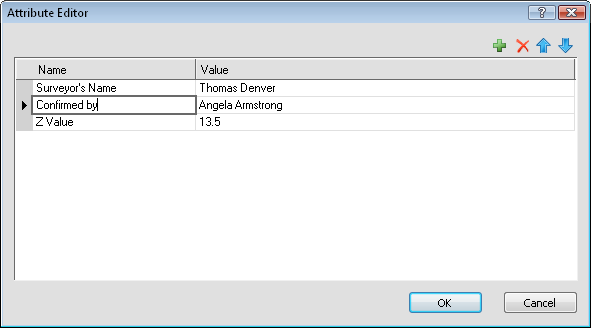
Edit or add information for each object in the Attribute Editor dialog.
The Name column contains the name of the attribute. To change the name, click in the box next to the existing text and type the desired text.
The Value column contains the text associated with the attribute. Values can be text or numbers. To change the value, click in the box next to the existing text and type the desired text.
Click the  button in the
top right section of the dialog to add a new blank row. In the blank row,
click in the Name box and type
the name of the attribute. Click in the Value
box and type the value for the attribute.
button in the
top right section of the dialog to add a new blank row. In the blank row,
click in the Name box and type
the name of the attribute. Click in the Value
box and type the value for the attribute.
Click the  button in the
top right section of the dialog to delete the selected row. If the button
is not available, click anywhere in the row to select that row and then
click the button.
button in the
top right section of the dialog to delete the selected row. If the button
is not available, click anywhere in the row to select that row and then
click the button.
Click the  button to move
the selected attribute up one row. Click the
button to move
the selected attribute up one row. Click the  button
to move the selected attribute down one row. The order of the attributes
in the Attribute Editor dialog is the same order that the items appear
on the Info page in the
Property Manager.
button
to move the selected attribute down one row. The order of the attributes
in the Attribute Editor dialog is the same order that the items appear
on the Info page in the
Property Manager.
To edit an attribute for an object,
Click on the object to select it.
In the Property Manager, click on the Info tab.
Open
the Options section by clicking
the  next to Options.
Click on the Edit button next to Edit attributes.
In
the Attribute Editor, click
the button to add a new
blank row.
In the blank row, click in the Name column. Type the desired attribute name, such as Surveyor's Name.
Click in the Value column. Type the desired description, such as Thomas Denver.
To
move the attribute, click on the row and click the
or until the attributes
are in the desired order.
Click
OK and the attributes
are displayed on the Info
page.
See Also