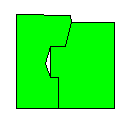
A sliver is a small gap between two adjacent areas or curves that share a common border. Slivers can be eliminated from existing boundaries with the Reshape command.
The graphic above shows
a sliver between two areas.
Editing Slivers
To fix a sliver like the one shown above:
1. Select the area on the right.
2. Select the Edit | Reshape command or click the  button.
3. Notice there is no vertex in the sliver area. Hold down the CTRL key on your keyboard and click to add a new vertex in the sliver section.

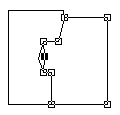
The graphic on the left shows the vertices as
hollow squares. There is no vertex in the sliver
section. The graphic on the right shows the added vertex.
4. Once the vertex has been added, make sure the new vertex is selected (solid black box), hold down the ALT key, and then drag the vertex to the left. This "snaps" the new vertex to the vertex in the left area.
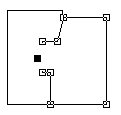
Use the ALT key to snap the
new vertex to an existing vertex.
5. Click ENTER to end reshaping the right area.
Editing Complex Slivers
In the example above, there was one "missing" vertex that caused the sliver. If there is more than one missing or unshared vertex in a slivered section, you may need to edit both sides of the adjoining area. Use the ALT key to snap the vertices in both areas or curves.
Drawing without Slivers
If you are drawing areas or curves, you can trace the boundary to avoid slivers. Refer to the Tracing an Existing Boundary topic for more information.