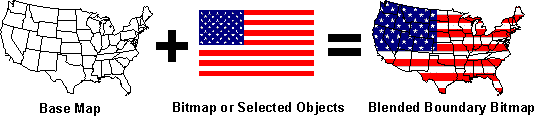
MapViewer base maps can be blended with image files or selected objects to create a unique image, called a blended boundary image. Blended boundary images act as a background for a base map or for some thematic map types.
To create a blended boundary image:
1. Create
a base map using the Map
| Create | Base Map command  .
.
2. Once
you have a base map file loaded, select the Draw
| Image | Blend command  .
.
3. In
the Create Blended Boundary Image dialog,
select a Blending source. The
From a bitmap file option uses
the bitmap file specified in the dialog. Click the  button to open a bitmap. The From selected
objects option uses the selected objects to create a blended boundary
bitmap. The selected objects must be located within the base map boundaries
and on the same layer to appear in the blended boundary bitmap
button to open a bitmap. The From selected
objects option uses the selected objects to create a blended boundary
bitmap. The selected objects must be located within the base map boundaries
and on the same layer to appear in the blended boundary bitmap
4. After all the appropriate settings have been made, click the OK button. Once you return to the map window, notice there is a bitmap object listed in the Object Manager.
5. If you would like to create a thematic map, select Map | Thematic Map and the map type. (Prism maps and hatch maps with hatched areas do not work with blended boundary bitmaps.)
The Create Blended Boundary Image dialog contains options for using an image or objects to blend with a base map. You can also control the image dimensions and color depth in this dialog.
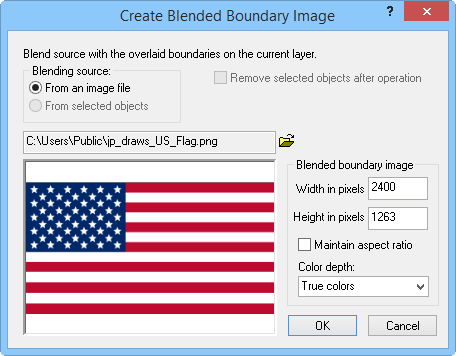
The Blending source section determines whether you want to use selected objects or an image to create a blended boundary image.
Click
the From an image file button
to use an image. If this option is chosen, select a image file using
the  button. A preview
of the image appears below the file path name.
button. A preview
of the image appears below the file path name.
To use selected map objects as the blending source, click the From selected objects button. To remove the selected objects after the blended boundary image is created, check the Remove selected objects after operation box.
The properties of the resulting image are controlled in the Blended boundary image group. The Width in pixels and Height in pixels options allow you to define the size of the blended boundary image. To change pixel size settings and preserve the aspect ratio, check the Maintain aspect ratio check box. The Color Depth list allows you to choose from True colors or 256 colors.
If your boundary file does not contain any filled objects, it is recommended to select the blended boundary image and use the Arrange | Move to Back command to move it behind the boundary objects.
Hatch maps created with the Hatched Area option do not work well with blended boundary images as the hatch fill obscures the blended boundary image or vice versa. Select Hatched Circle or Hatched Square if you wish to use a blended boundary image with a hatch map.
Blended boundary images cannot be used with prism maps. If you would like to use a image with a prism map, use the prism map texture mapping instead.
See Also