MapViewer contains boundary files in the Samples folder. In addition to these boundary files, you can create your own boundaries or import them from another source. All maps must have primary IDs assigned to the boundary objects (polygons, polylines, and points). If you are importing boundaries from an outside source, keep in mind that Atlas Boundary [.BNA], ESRI ArcInfo Export Format [.E00], MapInfo Interchange [.MIF], and ESRI Shapefiles [.SHP] files can carry primary IDs.
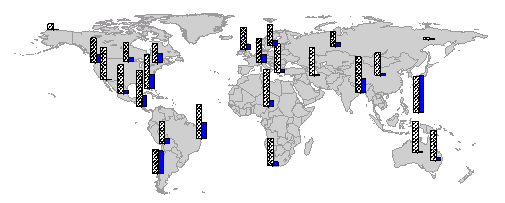
Boundary files can be used for map reference. In the map above, the bar map
was created from a pin map, and the map of the world is used for reference.
1. Select
the File
| New | Plot command or click the  button on the
Quick Access Toolbar.
This creates a new plot document
for displaying a map.
button on the
Quick Access Toolbar.
This creates a new plot document
for displaying a map.
Note: Opening a new plot automatically switches to the new plot document in the MapViewer window. You can click the tabs at the top of the window to switch between plot and worksheet documents. If you opened MapViewer and directly started the tutorial, you should have Plot1, TUTORIAL, and Plot2 document tabs at the top of the window.
2. Click
the Map
| Create | Base Map command  to display the Import
dialog. The boundary file to display in the map window is selected
in the Import dialog. Alternatively,
you can select the File
| Import command or click the
to display the Import
dialog. The boundary file to display in the map window is selected
in the Import dialog. Alternatively,
you can select the File
| Import command or click the  button on the Quick Access
Toolbar to open the Import
dialog.
button on the Quick Access
Toolbar to open the Import
dialog.
3. In the Import dialog, browse to the MapViewer 8 Samples folder. Next, click the down arrow in the File type field, and then choose Common Graphic Files (*...). In the list of files, click TUTORIAL.GSB and the name appears in the File name box. Check the Append image, Show options if they are available, and Scale map if it's too big boxes if they are not already checked. Next, click the Open button.
4. In the Import Options dialog, you can define the ID columns for the primary ID, secondary ID, attributes, and hyperlink. For this example, the default import options are acceptable. Click the OK button and the boundary map is displayed in the map window. Note: The default properties are as follows: Create PID is set to Primary and Create SID is set to Secondary. The Create Hyperlink box is not checked. All available attributes and Import objects to their specified layers if multi-layers exist are selected. The Import attributes list to linked worksheet and Import objects that are (partially) within the limits of the existing map options are unchecked.
If the file you are importing does not contain IDs, for example, AutoCAD Drawing [.DXF] files, you can assign IDs to objects in the map by selecting the boundary object (for example, click on a polygon) and typing the ID into the PID field of the Info page in the Property Manager.
When you are creating a thematic map, you are prompted for a boundary file automatically unless a boundary file is already opened. See Lesson 3 - Creating a Thematic Map for information on this procedure.
Back to Lesson 1.1 - Opening a Data File
Next to Lesson 3.0 - Creating a Thematic Map