 button, to open the Export dialog. The File
| Export command is disabled if there are no objects in the MapViewer document.
button, to open the Export dialog. The File
| Export command is disabled if there are no objects in the MapViewer document.The File | Export command saves files as graphic files to use in other programs.
Click the File | Export command,
or the button, to open the Export dialog. The File
| Export command is disabled if there are no objects in the MapViewer document.
Where applicable, the export filter exports attribute information for lines, polygons, and symbols. With contour maps, the File | Export command can be used to export Z information to an attribute field for BLN, BNA, GSB, GSI, KML, KMZ, MIF, and SHP files.
Click the File | Export command to open the Export dialog.
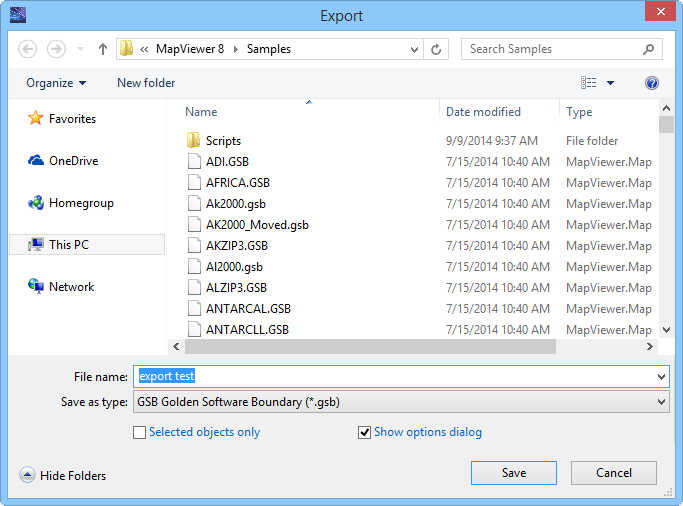
Specify the save location, file name, and file type in the Export dialog.
The Save in field shows the current directory. Click the down arrow to see the directory structure and click on the folders to change directories. The buttons to the right of the Save in field allow you to create new folders and change the view of the file list.
The file list displays the files using the extension specified in the Save as type box. A file can be overwritten by selecting it from the file list.
The File name box displays the name of the selected file, or type in the path and file name of the file to be exported.
The Save as type list box specifies the format of the file to be exported.
Selected Objects Only
Check the Selected objects only box to export selected objects rather than the entire plot.
Check the Show options dialog option to display the Export Options dialog for the selected Save as type. If the Show options dialog option is selected when the Save button is clicked, the Export Options dialog appears. The Scaling page and Size and Color page of the Export Options dialog is uniform. Additional pages in the Export Options dialog may be available dependent on the export format type.
Export files typing a name into the File name box and then selecting the file type in the Save as type list. For example, typing MYPLOT in the File name box and choosing Tagged Image (TIFF) from the Save as type list results in MYPLOT.TIF. There is no need to type in an extension because it is automatically added. If a file extension is typed in the box along with the file name, the file type is determined by the typed extension. For example, if MYPLOT.DXF is typed in the File name box, the resulting file is in the AutoCAD DXF format, no matter what is set in the Save as type field.
If the map that you are exporting is in a defined coordinate system, the Spatial References tab will appear after clicking Save. This dialog allows you to specify the file format to which you want to save the projected information. Check the desired file formats. It is recommend that GS Reference (Version 2) file option be checked to generate a .GSR2 file. Click OK and the file is saved.
The file specific page in the Export Options dialog is specific to the export type you selected.
MapViewer supports the following export format types:
See Also