 button
in the Map page of the Property
Manager for a contour map opens the Levels
dialog.
button
in the Map page of the Property
Manager for a contour map opens the Levels
dialog.Clicking the button
in the Map page of the Property
Manager for a contour map opens the Levels
dialog.
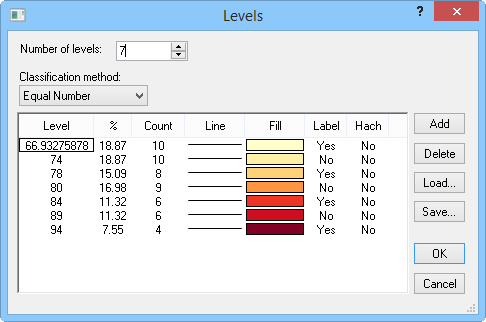
Select the number of classes and classification method, set user-defined levels, and load
or save levels in the Levels dialog.
Number of levels specifies
the number of levels used in the map. This is equal to the number of levels
displayed in the Objects in levels box.
Type a number into the Number of levels
box or change the value with the  .
.
Select a Classification method from the list.
Equal number calculates the level minimum such that an equal number (or as close to it as possible) of data values fall within each level.
Equal intervals calculates the level minimum such that the intervals between levels are equal. The Increment box is displayed when Equal intervals is selected, and this shows the range covered by each level The Auto determine levels box is also displayed when Equal Intervals is selected. Click the Auto determine levels box to have MapViewer determine the number of levels.
Standard deviation generates data levels based on the standard deviation of the data. When the Standard deviation method is selected, the Increment field appears. The Increment field allows you to define the standard deviation increment to establish the level ranges and number of levels. The Increment and Number of levels values are dependent upon each other, so changing one value automatically changes the other.
The Jenks' Natural breaks method creates levels based on the optimal natural breaks in your data.
User defined allows you to create your own level definitions. Double-click on the Level values in the Objects in levels list to define the classes after you define the Number of levels. Click on the Level column title to open the Auto Determine Contour Levels dialog where you can specify the range and interval for levels.
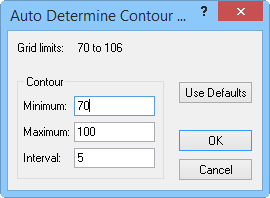
Set contour level range and interval in the Auto
Determine Contour Levels dialog.
Click on the Line, Fill, or Label column headers to edit properties for all levels in the Line or Fill dialog. Alternatively, double click on an individual level line or fill to edit its properties.
Edit contour labels in the Labels dialog by clicking on the Labels title in the header row of the Objects in levels list.
Edit contour hachures in the Hachures dialog by clicking on the Hach title in the header row of the Objects in levels list.
Click Add to add another level to the Objects in levels list.
Click a level row and then click Delete to remove a level from the Objects in levels list.
Once the levels are defined, they can be saved for reuse in a level file [.LVL]. Click the Save... button to save the levels. To use an existing level file, click the Load... button.
See Also